Just so you know...I didn't start out taking pictures of this project, so the first few pictures start out with a lot of explanation, but the reading gets easier as you get farther down.
I have been wanting to get a bigger purse so I can throw a diaper and some wipes in and get rid of the diaper bag. My father-in-law gave me a purse organizer for Christmas. So...I decided to base my measurements so the organizer would fit in my new purse, and that way I wouldn't need to make pockets.
So I figured the height(h), width(w), and depth(d) that I wanted for my finished purse and made my rectangle (h+1"+1/2d) by (w +1"+1/2d). I wanted a purse that was 9"high x 13" wide x 3" deep, so my rectangle measured (9+1+1.5=)11.5" x (13+1+1.5=)15.5. I cut two of these rectangles from my main fabric (and applied iron on interfacing), and two from my lining fabric.
I cut out an a rounded rectangle 1" wider than I wanted my finished product and long enough to experiment with out of interfaced main fabric and lining fabric.
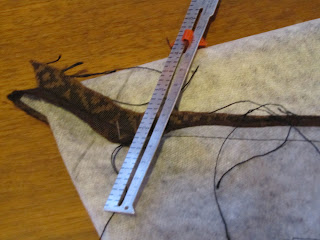
I cut out a piece for my strap twice as wide as I wanted the finished strap plus 1" and long enough to hang over my shoulder and attach the bag where I wanted. I stitched the long sides into a tube(right sides together), turned it right side out and top stitched close to the seams (I tried to interface the strap, but was having a hard time getting it to stick and when I turned it right side out, I'm sure it got all wonky. I don't think I would have used interfacing if I had known the outcome, especially since I used such a heavy weight fabric anyway. Luckily, I used a lightweight interfacing, so the problem isn't noticeable.)

Hmm...I forgot to take a picture of my ruffle piece before I started sewing, but I cut 1 rectangle twice as wide as I wanted my pleats plus 1" and about twice as high as my finished purse height doesn't need to be exact. I sewed it into a long tube (right sides together) then folded the tube flat with the open seam in the center of the back. Then I sewed the bottom closed and turned the tube right side out. The top of my tube was the salvage edge and won't unravel, but if it wasn't I would have needed to tuck the top end inside and stitch closed. I top stitched around the edges of my folded tube and pinned the bottom 2" (1.5" for half of the depth and .5" for the seam allowance) up from the bottom of my rectangle for the outside of my purse and the top edge down 1" from the top (.5" for the seam allowance and .5" because I didn't want it butted up against the top). Oh, and I made sure it was centered.

Then I folded and pinned wonky pleats. I had to reposition them a few times so they were spaced nicely. Then I stitched the pleats to the rectangle on top of all the top stitching that was still visible and along the top edge.
Then I sewed the rectangles together along the sides and the bottom (right sides together).
I folded the sides toward the bottom and marked a 3" (the depth for my finished purse) line making sure half-way was on the matched up seams, and stitched on the line on both bottom corners.
I clipped off the corner to reduce the bulk.
Then I did the same thing to the lining rectangles but I left a whole in the middle of the bottom seam for turning right side out later.
I didn't want to worry about ironing so I top stitched the outside layer of my purse along the side and bottom seams, getting as close to the corners as I could.
I wanted a well defined base so I pinned 1.5" (half of my depth) out from each side of my bottom seam, and top stitched about 1/4" from the folds.
See, now it kind of stands up.
"When I get it all together" you won't see my projects sitting on an otherwise messy table. But if I wait to invite you into my house "when I get it all together" I don't think it will ever happen.
Hmm...somewhere before this point I sewed together those curved rectangles (right sides together) clipped the curve, turned it right side out on the short straight end, and top stitched the edges. I pinned the curved end where I wanted it to attach on top of the ruffle, measured 3" (the depth of my purse) from the top of my purse, and cut off the excess.
Then I pinned the flat side to the center of the other top side of the purse (right sides together), and pinned the ends of my straps to the sides.
I pinned the lining and shell together (you guessed it, right sides together) and stitched them together.
I wanted to make sure my purse had plenty of definition, so after pulling the lining and shell apart, I folded and pinned 1.5" from each side of each side seam, marking 2" down on lining and 2" down on the shell (so 4 places all together.
Then I stitched lines on the 4 folds as narrow as I could measure on my machine.
Finally, I pulled my purse right side out through the hole in the lining...
...and top stitched the hole closed (nobody's going to see it other than my purse pilfering little girls).
I top stitched the front and back top.
Ta da! I'm looking for a wooden toggle button to attach my flap.
This was the purse I made a couple weeks ago...kind of reminded me of a diaper. I won't bother telling you how I made it, but this is why I wanted plenty of definition.


